
Flying in Controlled Airspace Without an Internet Connection: How FlightDeck’s Airspace Checker Works

Cloud-based airspace tools work well when you have a connection. At a rural tower site with marginal or absent cell signal, they don’t work at all. The question of whether you’re authorized to fly at a given location needs an answer before you set up equipment — not after you’ve driven two hours and discovered the app won’t load.

FlightDeck’s Airspace Checker runs against locally stored FAA data files. It answers the authorization question with no internet connection required.

What Gets Checked

The Airspace Checker evaluates each site against five categories of FAA data.

Airspace classification uses FAA polygon data to determine whether a site falls in Class B, C, D, E, or G airspace and whether Part 107.41 authorization is required. The classification drives the authorization pathway — LAANC, DroneZone COA, or no authorization required.

UASFM grid lookup reads the FAA’s UAS Facility Map data to determine the LAANC ceiling altitude available at each site. This is the number that determines how high you can fly via instant LAANC authorization and whether your operating altitude requires Further Coordination or a manual COA.

LAANC eligibility is evaluated automatically based on the airspace class and grid altitude. Sites where LAANC is sufficient get one determination. Sites in zero-grid Class B or Class C airspace — where the LAANC ceiling is 0 feet — are flagged as requiring a manual FAA DroneZone COA.

Special Use Airspace checks identify any restricted areas, Military Operations Areas, prohibited areas, and TFR-equivalent restrictions within 0.5 nautical miles of the site. Proximity to special use airspace doesn’t automatically prevent operations, but it’s information your pre-flight risk assessment needs.

Nearest airport analysis identifies the closest airport by Haversine distance, with ICAO identifier, airport type, airspace class, and cardinal bearing. The check also flags sites where the operating altitude exceeds 400 feet AGL and is more than 400 feet above the structure, which indicates a Section 107.51(b) waiver may be required.

The Results Grid

Results are displayed in a color-coded grid. Deep green indicates LAANC-authorized — the site can be flown with standard LAANC auto-approval or 72-hour coordination. Deep red indicates a COA or waiver is required — LAANC is not sufficient. Other indicators appear for Class G sites and sites with special use airspace conflicts.

The Complete Workflow button runs all four analysis steps in sequence — Load FAA Data, Load Sites, Check All Sites, and TFR Check — without stepping through each action manually. For daily project analysis, this is the standard approach.

Keeping FAA Data Current

The offline check requires that local FAA data files be current. The built-in FAA Data Updater fetches the latest UASFM grids, class airspace boundaries, SUA polygons, and airport data on demand. Running the updater periodically — before a new project starts, or whenever the FAA publishes updates — keeps the offline database current.

The TFR check is a separate online step. TFRs are too dynamic for a static local database — they’re issued and cancelled on short notice. The Airspace Checker’s primary analysis runs offline; the TFR overlay is the one component that requires connectivity when it’s available.

PDF Export

The Airspace Checker generates a professionally formatted PDF report of results, ready for signature and submission as part of a COA application or project compliance record. The report includes the authorization determination for each site, the nearest airport data, and any special use airspace conflicts — the information that typically needs to be documented in a pre-flight record or formal authorization package.

For operators managing projects with COA requirements, having a printable authorization summary per site is the difference between a documented compliance record and a verbal account of what the app said.


Try FlightDeck free for 30 days.

Closing Out a Project Right: Archiving, Invoicing, and Your Flight History

Project closeout is where flight records either get preserved properly or disappear into a tangle of old spreadsheets. It’s also where billing discrepancies, incomplete submissions, and missing documentation tend to surface — after the deadline has passed and the client has moved on.

A clean closeout process protects your historical data, finalizes billing, and resets your system for the next project without carrying forward any confusion from the last one.

Invoicing Before You Archive

Before closing out a project, every site needs an invoice entry and a final billing status. FlightDeck’s Invoice Management tool presents each completed site with its Site ID, pilot pay, invoice amount, and current status — Flown and Complete — so you can enter final billing numbers and reconcile against your actual deliverables.

If you’re working with Salesforce for client billing, the Invoicing tool supports a direct Salesforce import that maps your completed site data to the appropriate billing records. The match runs against your project data and updates invoice fields from the import file, which eliminates the manual cross-referencing between FlightDeck and your billing system.

Completing billing before archiving matters because the archived data is your permanent record. Whatever numbers are in the working file when you archive are what go into your historical flight record.

The Combine and Archive Process

FlightDeck’s Combine and Archive tool runs a seven-step process that merges your completed project into the master AllFlightData.xlsx record and resets the working environment for the next project.

The steps run in sequence: first, any blocking applications — including LiveView_DATA, which holds the working data file open — are closed. Excel is closed after a confirmation prompt. Then the current working files are moved to a Combine staging folder, merged with the existing AllFlightData record, and the merged file is saved both as the new AllFlightData.xlsx and copied to the Archive folder as a backup. Temporary files are deleted. Working file templates are reset to blank.

The tool shows progress through each step as it runs, with a checkmark when each completes. The whole process takes under a minute for most project sizes.

What Gets Preserved

The archived AllFlightData.xlsx is your cumulative flight history — every project, merged in sequence. Over time this becomes the record of every site you’ve flown, every authorization you held, every invoice you processed. It’s the data that answers questions like “did we fly this tower before?”, “what was our pilot pay rate for that carrier last year?”, and “how many sites did we complete in Q3?”

That historical record has real business value if it’s maintained consistently. It also provides documentation in the event of an audit, a dispute, or a compliance review — a complete flight history is materially different from a folder of old project files that have to be reconstructed manually.

Resetting for the Next Project

After the archive runs, FlightDeck resets the working templates to a clean state. The next project import starts from scratch — no residual data from the previous project, no risk of mixing completed sites with new ones.

This reset is part of why the Combine and Archive tool asks for confirmation before running. The action is irreversible: once the working files are deleted and the templates reset, the previous project’s working data is gone from the active environment. It lives in the archive, but it’s no longer in the working files.

The confirmation prompt makes that explicit. The progress display makes the steps visible. The end result is a clean system and a complete historical record — which is what project closeout should produce.

Try FlightDeck free for 30 days.

How Multi-Threaded Upload Saves Field Time on Large Tower Inspection Jobs

Uploading hundreds of photos from a rural tower site on intermittent cell signal is where field time disappears. A standard single-threaded upload that hits a connection drop has to start over. A system without state tracking can’t tell what already uploaded successfully. On a large dataset at a remote location, these aren’t edge cases — they’re the normal operating environment.

FlightDeck’s QC Uploader handles this with a multi-threaded upload architecture and a persistent SQLite manifest that tracks every file individually.  Out of the box, you’ll experience 4x upload processing, adjustable to 10 simultaneous threads.


How the Upload System Works

Phase 3 of the QC Uploader workflow is the AWS S3 upload. Multiple concurrent worker threads run simultaneously, each pulling jobs from the upload queue. Every JPEG and every KML file in the dataset is registered in the manifest database before any upload begins. Workers pick up files from the queue, transfer them to your configured S3 bucket, and report status back as each file completes.

The manifest records four states for every file: Pending (queued, not yet started), Uploading (transfer in progress), Uploaded (confirmed complete), and Failed (transfer did not complete). Each file’s state is written to a local SQLite database — upload_manifest.db in your project root folder — as the upload runs.

Resumable Uploads

When connectivity drops mid-upload, you don’t lose your progress. When you restart the upload, the manifest is read first. Files marked as Uploaded are automatically skipped — they don’t get re-transferred. The workers pick up from the remaining queue and continue.

On a 1,200-photo dataset where 800 photos uploaded before the connection dropped, restarting the upload means 400 files to go, not 1,200. On a rural site with marginal signal, this is the difference between finishing the upload before you leave and having to come back.

S3 Configuration

The upload system connects to AWS S3 using standard credentials: bucket name, region, access key, and secret key — configured in the Settings tab of the QC Uploader. The bucket and credentials are set once and apply across all projects. If you’re delivering data to multiple clients with separate buckets, updating the settings between projects takes about 30 seconds.

Single-Dataset Mode

On a project with dozens of sub-folders, you sometimes need to re-upload a single site — a re-fly, a corrected KML, a client request for a specific tower’s data. The Dataset Selection filter limits the upload to the selected sub-folder without affecting the rest of the manifest. Files in other sub-folders keep their Uploaded status; only the selected dataset is re-queued.

This matters because re-running a full project upload to handle one sub-folder isn’t practical when you have hundreds of sites already delivered. Single-dataset mode makes targeted re-delivery a one-minute operation.

Cancel and Reset

If you need to abort an upload and start fresh — wrong bucket configured, new credentials, dataset needs to be rebuilt — the Cancel and Reset function stops all active workers and clears the manifest after confirmation. The clear is intentional: it requires a confirmation step because clearing the manifest means the next upload will re-transfer everything regardless of prior state.

Upload as the Last Step

The QC Uploader workflow runs in order: EXIF quality analysis, KML generation, then upload. By the time files are queued for transfer, they’ve been checked for aperture, ISO, and GPS coverage, and a color-coded KML has been generated. What reaches your S3 bucket is a reviewed, documented dataset — not raw field photos dumped to cloud storage.

For clients who receive data directly from S3, that means what they download is already organized and annotated. For your own archive, it means every delivery has an associated quality record.

Try FlightDeck free for 30 days.

What Is Geoid Undulation and Why Does Your Drone Altitude Depend on It?

Your drone records altitude relative to the WGS84 ellipsoid — a smooth mathematical model of the Earth’s shape. Google Earth renders its terrain surface relative to the geoid — a model of the Earth’s gravity field that approximates mean sea level. These two reference surfaces don’t line up. The vertical gap between them at any given location is called geoid undulation, and if you don’t account for it, your camera icons in Google Earth will appear to float above or sink below the ground surface.

In the Gulf Coast region of Louisiana, for example, the WGS84 ellipsoid sits approximately 27 to 28 meters above the geoid. A drone hovering at what its GPS reports as 3 meters of altitude appears at roughly -25 meters in Google Earth — effectively underground. The correction isn’t a workaround — it’s a required step for accurate spatial visualization.

What Doesn’t Get Changed

It’s important to understand what the altitude correction actually modifies. The drone’s raw GPS measurements are preserved exactly as recorded in the KML’s extended data block. The absolute altitude value embedded by the drone, the AGL altitude from the barometer, the original EXIF record — none of these are touched. The correction applies only to the coordinates element in each photo’s placemark, which is the value Google Earth reads to position the camera icon vertically on screen.

What changes is where Google Earth draws the icon. What doesn’t change is the underlying GPS record. If a digital processing team opens any photo’s placemark balloon in Google Earth, the raw measured values are there, unmodified, in the extended data.

FlightDeck’s Geoid Calculator

Manually calculating geoid undulation requires geodetic data and formulas that most commercial UAS operators don’t have in their normal workflow. FlightDeck automates this using GCP data from Aeropoints.

When you conduct a ground control point survey with Aeropoints equipment, the exported CSV contains both the GPS-derived ellipsoidal height and the orthometric height (height above the geoid) for each control point. The difference between those two values at each point is the geoid undulation for that location. FlightDeck’s Geoid Calculator reads your Aeropoints CSV, computes the undulation at each GCP, and returns the mean value across all points — along with the standard deviation, minimum, maximum, and point count.

That mean value is what you enter as the Altitude Display Offset in the QC Uploader’s KML tab. The calculation takes seconds. The alternative — looking up geoid undulation values in NOAA’s geoid model tables and averaging them manually — is the kind of step that gets skipped when it shouldn’t be.

Reading the Calculator Output

The summary from the Geoid Calculator shows you more than just the mean. The standard deviation tells you how consistent the undulation is across your survey area — a low standard deviation means the offset applies evenly across the site; a high one suggests terrain variation that may cause some icons to appear slightly off even after correction.

The geoid model name (typically GEOID12B or GEOID18 for most U.S. operations) is recorded from the CSV header. If the Aeropoints file was exported with height values in feet rather than meters, the calculator detects this and converts before computing the undulation.

Why This Matters for Deliverables

For tower inspection work specifically, the Altitude Display Offset is what makes a KML deliverable look professional. Camera icons at the correct elevation above Google Earth’s terrain surface give reviewers an accurate visual of where the photos were taken relative to the structure. Icons floating 27 meters in the air, or buried underground, tell a different story — and one that raises questions about data quality regardless of whether the underlying GPS record is perfectly accurate.

The Geoid Calculator in FlightDeck is the step that connects your survey data to a visually accurate deliverable. It’s included in every license tier.

Try FlightDeck free for 30 days.

Pilot Currency, Drone Maintenance Logs, and the Compliance Blind Spot Most Operators Have

Most commercial UAS operators know when their Part 107 certificate expires. Fewer track pilot medical currency, insurance expiration, individual aircraft maintenance intervals, and battery health in a single system — and most don’t find out that’s a problem until an audit, an incident, or a client’s compliance questionnaire forces the issue.

These are the records that prove your operation was conducted safely and legally. They don’t need to be elaborate — but they need to exist, and they need to be current.

What Compliance Actually Requires You to Track

For a commercial UAS operation, the baseline compliance record set includes Part 107 certificate numbers and expiration dates for every pilot, medical certificate class and currency where applicable, insurance policy expiration, FAA registration numbers for every aircraft, and aircraft-specific maintenance records.

COA applications require you to list your RPIC roster with certificate numbers. Insurance certificates come up in client onboarding. Maintenance records matter if an incident occurs and the question becomes whether the aircraft was airworthy. These aren’t theoretical requirements — they’re documents that get requested, and “I didn’t keep that” is not an acceptable answer in any of those situations.

FlightDeck’s Compliance Manager

The Compliance Manager in FlightDeck tracks all of this in a structured database, organized into tabs that mirror how the information is actually used.

The RPIC Roster tab records each pilot’s full name, contact information, Part 107 certificate number and expiration, medical certificate class and expiration, and insurance expiration. Every expiration date gets a status indicator — green for current, yellow for approaching, red for expired or critically close. If any single expiration is red, the overall pilot status shows red. The status rolls up so you can see at a glance whether every pilot on your roster is current.

The Aircraft Fleet tab records make, model, FAA registration number, airframe serial number, flight controller serial number, and Remote ID module — the fields that go into COA applications and appear on incident reports.

The Maintenance Log

The Maintenance Log tab is the flight-by-flight inspection record. Each entry records the date, the RPIC, the aircraft by FAA registration and model, flight hours, whether props were inspected, battery condition, whether any cracks or structural issues were found, screw tightness, firmware versions for both aircraft and remote, software version, and GPS/RTK status. There’s also a notes field for anything that doesn’t fit a checkbox.

These entries are written from the Drone Maintenance app and read by the Compliance Manager, which means the record is populated as part of normal pre- and post-flight operations rather than as a separate administrative task.

The entire maintenance history is filterable by RPIC, by aircraft, and by date range. When you need to pull records for a specific aircraft over a specific period — for an audit, an insurance claim, or a client requirement — the filter takes seconds.

Battery Pool

The Battery Pool tab tracks each battery in your fleet: serial number, model, type, assigned RPIC, current custody, status, cycle count, health percentage, and date last seen. Battery health degrades over cycles, and tracking this per-unit lets you catch batteries that are approaching end-of-service before they become a problem in the field.

The Record That Wasn’t There

Compliance records have a way of mattering at exactly the worst time — when something goes wrong, when a client’s procurement team runs a vendor audit, when a government contract requires documentation. The operators who fare best in those situations are the ones who’ve been keeping records all along, not the ones who have to reconstruct history from memory.

The Compliance Manager in FlightDeck doesn’t turn record-keeping into a project. It makes it part of the normal workflow so that when the records are needed, they’re already there.

Try FlightDeck free for 30 days.

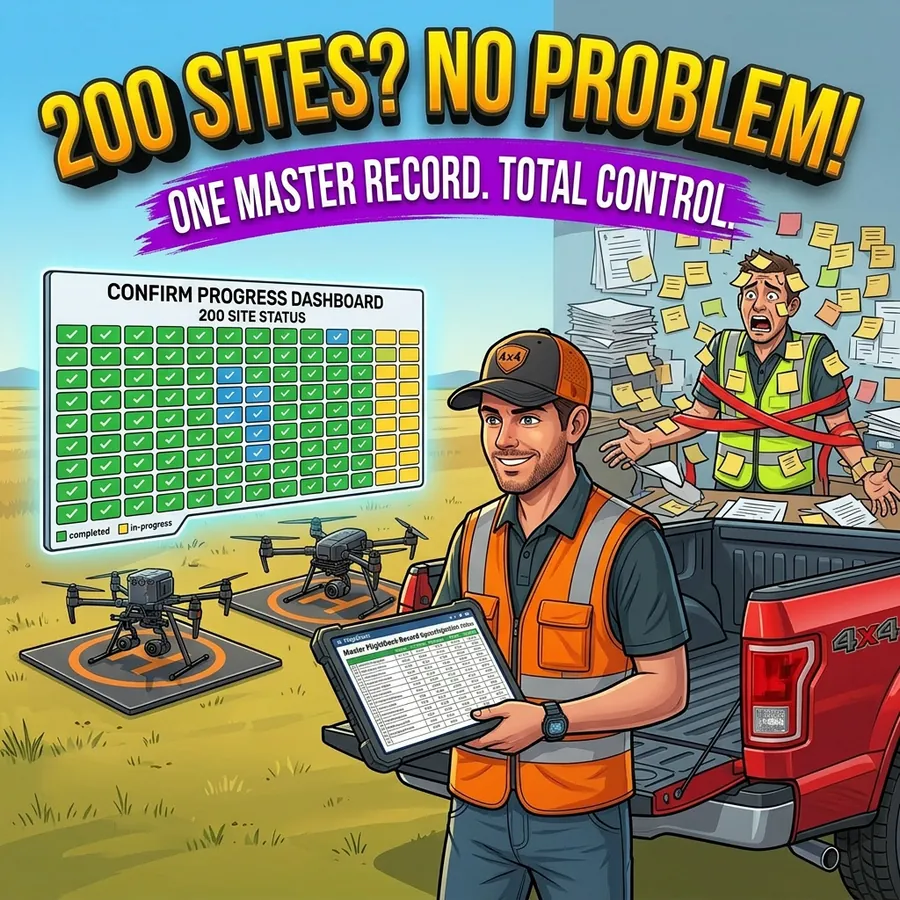
Managing a 200-Site UAS Project Without Losing Your Mind

A 200-site tower inspection project isn’t 200 flights. It’s 200 individual planning decisions — airspace classification, authorization status, weather windows, scheduling, folder structure, data collection, upload, QC, reporting, and invoicing — multiplied by 200 and run in parallel across a project timeline that usually has a fixed end date.

The operators who manage this well aren’t necessarily smarter or more experienced. They’re using better tools for the parts that don’t require their expertise.

Starting a Large Project: Batch Import

Most large commercial UAS projects start with a client-provided spreadsheet — a list of tower locations, site IDs, and whatever project-specific fields the client includes. The column names vary by client, by carrier, by year, and by whoever built the original template.

FlightDeck normalizes this automatically. When you place your data file as UpdatedFlightData.xlsx in the data folder and run the processor, FlightDeck maps more than 50 common column name variations to its standard set. “Node” becomes Site ID. “Lat” becomes Latitude. “CDD” becomes Due Date. “Scan_Type” becomes MOP Type. Dozens of variations that would otherwise require manual column renaming are handled before the data ever enters your working file.

New entries are geocoded using their address or coordinates. Sites already in the system are updated without overwriting completed records. The merge is non-destructive.

The Progress Scoreboard

The FlightDeck dashboard shows three numbers at all times: R for remaining flights, F for flights flown and logged, and T for total historical flight records. These update automatically as flight status changes.

Each site in the project moves through six status stages: Not Scheduled (0%), Scheduled (10%), Flown (40%), Forms Needed (50%), Submitted (90%), and Complete (100%). These stages drive the progress calculation and tell you and any supervisor reviewing the project exactly where every site stands — not whether the data file was updated, but what stage of completion each site has reached.

For a 200-site project, being able to answer “how many sites are at Forms Needed stage?” or “how many are complete and invoiced?” without manually counting rows is the kind of visibility that makes a project manageable.

Folder Structure Automation

Before flying, you need a directory structure ready to receive data — a sub-folder for each site, organized consistently so photos, KML files, and reports all land in the right place. On a 200-site project, creating those folders manually is an hour of tedious work that doesn’t require your judgment.

FlightDeck’s Create Folders tool reads your site list and generates the full directory structure automatically. Every site in your project gets a folder, named exactly to match the Site ID, with all required sub-directories created. Run it once at project start, and your folder structure is ready for the entire project.

Daily Reports

The 3-Phase Update generates daily reports automatically as part of its output. Supervisors and project managers who need to know current status don’t need to interrupt your field operations to ask — the report reflects the state of the project as of the last update run, and it’s available without any manual data extraction.

The Compounding Advantage

The productivity argument for this kind of automation isn’t just time saved on individual tasks. It’s the compounding effect of not having to context-switch between flying and administrative work. Every minute spent updating a spreadsheet manually, creating folders, or chasing down a site’s authorization status is a minute not spent on the work that actually requires your expertise.

On a 200-site project, the administrative overhead is substantial. FlightDeck doesn’t eliminate all of it — there’s still judgment required at every stage. But it handles the parts that don’t require your judgment, which is most of the data management.

That’s the difference between a project that feels manageable and one that doesn’t.

Try FlightDeck free for 30 days on your next project.

KML Files for Drone Inspections: Why Google Earth Still Matters to Your Clients

A KML file is more than a deliverable artifact. It’s a spatially organized quality record — every photo placed at the GPS coordinates where it was captured, with the camera’s orientation shown, with the coverage overlap calculated for each frame. When it’s done right, a client or project manager can open it in Google Earth and immediately see exactly what was captured, where the gaps are, and whether the data quality is acceptable.

FlightDeck builds this automatically for every flight sub-folder in your project, using the EXIF and XMP metadata embedded in your photos by the drone.

What Goes Into Each KML

Phase 2 of the QC Uploader workflow is KML generation. For each photo in the dataset, the KML generator reads GPS coordinates, absolute altitude, and gimbal orientation data — pitch, roll, and yaw — and places a camera icon at the exact position where the photo was taken, pointing in the direction the camera was aimed.

Each camera icon has a view frustum that visualizes the gimbal direction. You can see at a glance whether the cameras were consistently pointed at the structure or drifting, and whether the angular coverage around a tower is complete.

The icons are color-coded by overlap percentage:

Green indicates 80% or higher sequential overlap — sufficient for photogrammetry deliverables and structural documentation. Yellow indicates 60–79% overlap — marginal, worth reviewing before delivery. Red indicates below 60% overlap — a gap in coverage that should be flagged for a potential re-fly.

The Extended Data Balloon

Clicking any camera icon in Google Earth opens a data balloon with the complete record for that photo: site ID, camera make and model, aperture, ISO, shutter speed, focal length, GPS coordinates, absolute altitude, AGL altitude, gimbal angles, aircraft orientation, overlap percentage, and QC pass/fail status for aperture and ISO.

This extended data is what your QC report, your client review, and any formal documentation can reference. Every measurement is directly from the drone’s embedded metadata — not derived or estimated.

Altitude Display Correction

KML files use absolute altitude mode, which means camera icons are placed at their GPS-recorded altitude relative to the WGS84 ellipsoid. Google Earth renders its terrain surface using SRTM data, which uses a different altitude reference. Without correction, camera icons may appear several meters above or below the actual terrain surface in Google Earth.

FlightDeck corrects for this with an Altitude Display Offset — an additive value in meters applied to every photo’s altitude when writing the KML coordinates. Set correctly, this makes camera icons appear at the right elevation relative to Google Earth’s terrain. The offset applies to both camera icon positions and any laser rangefinder target altitudes in the dataset, so the entire KML is consistent.

The Geoid Calculator tool in FlightDeck derives the correct offset for your specific survey area from Aeropoints GCP data — more on that in a separate post.

Single-Dataset Mode

On a large project, you may need to re-generate the KML for just one sub-folder — maybe a site was re-flown and you have new photos, or you’re adjusting the altitude offset for a specific location. The Dataset Selection filter in the QC Uploader limits KML generation to the selected sub-folder without touching the rest of the project. Clear the selection to process all folders again.

Why This Matters Beyond the Deliverable

The KML isn’t just for the client. It’s for your own QA before delivery. Opening the color-coded KML after a flight and before upload lets you verify coverage, spot the red icons that indicate gaps, and make the decision to re-fly before the job is closed out.

Catching a coverage gap from the Google Earth view is a quick conversation with a project manager and a targeted re-fly. Catching it after the client has reviewed the delivery is a different conversation entirely.

The KML generation in FlightDeck builds this review layer automatically, without requiring external GIS software or manual file preparation. It’s one of the outputs that tends to get noticed — clients who receive well-structured KML files alongside their photo deliverables understand that the data was reviewed and organized before it reached them.

FlightDeck’s KML generation is included in every license tier. Try it free for 30 days.

How COA Applications Actually Work — and How FlightDeck Helps You Prepare One

A Certificate of Authorization isn’t just a form. It’s a structured operational document that asks you to explain who will be flying, what aircraft they’ll use, how they’ll contain the operation, what happens if something goes wrong, and why the airspace risk is acceptable. The FAA reads these narratives — and how they’re written matters.

Understanding when a COA is required and what goes into one is foundational knowledge for commercial UAS operators working in controlled airspace.

When a COA Is Required

LAANC covers a large portion of controlled airspace authorizations for commercial UAS operations. But LAANC isn’t universal. Sites in zero-grid Class B or Class C airspace — where the LAANC ceiling is 0 feet — require a manual COA through FAA DroneZone. Sites where your required operating altitude exceeds the LAANC-available ceiling also require either a COA or a waiver for the portion that exceeds the limit.

FlightDeck’s Airspace Checker identifies which sites fall into each category automatically. Sites flagged as COA-required are marked in deep red in the results grid. Sites where LAANC is available are marked in deep green. That determination runs against locally stored FAA data — no internet connection required.

The FAA DroneZone Submission

COA applications are submitted through FAA DroneZone at faadronezone-access.faa.gov. The application is organized into numbered sections, and two of them — Section 7a (Operational Description) and Section 7b (Concept of Operations) — require narrative text that describes your specific operation.

The language in these sections needs to accurately describe your aircraft, your operating area, your lateral and vertical separation from the structure, and your contingency procedures. Generic boilerplate that doesn’t reflect your actual operation creates problems when the FAA reviews the application.

How FlightDeck’s COA Prep Tool Works

The Compliance Manager in FlightDeck includes a dedicated COA Prep tab with template narratives for the most common inspection operation types: communications tower, monopole, rooftop, billboard, and nationwide COA.

Each template uses token substitution — placeholders like the lateral separation distance and the altitude above the structure that get replaced with your actual values before the text is finalized. This means the narrative accurately reflects your specific operation rather than a generic description.

Section 7a is the operational description — what you’re doing, where, and with what aircraft. Section 7b is the concept of operations — how the flight is conducted, how you maintain VLOS, how you handle lost link, and how you respond to other aircraft. Both sections are pre-written with FAA-appropriate language and structured to address the specific questions the application asks.

A separate Site Authorization Prep tab covers the decision framework for individual site authorizations — walking through the airspace classification, what authorization pathway applies, and what the submission steps look like.

Tracking Your COA Status

Once a COA application is submitted, FlightDeck tracks its status in the COA Status column of your working data file. Status options range from application in progress through approved, with the COA Prep column recording the DroneZone application link for direct access from your spreadsheet.

Renewals need to be tracked as well. The general guidance is to apply for renewal at least 45 days before the current authorization expires — the FAA processing timeline can vary, and a lapse in authorization means work stops until the new one is issued.

What the COA Process Actually Takes

A well-prepared COA application with accurate narratives, a complete aircraft description, and a properly scoped operating area typically processes faster than a vague one that requires FAA clarification. The COA Prep tool in FlightDeck isn’t a shortcut — it’s a framework that helps you write an accurate, complete application the first time.

For operators doing regular work in controlled airspace, having template narratives ready to adapt to new sites is a significant time saver. The alternative is writing from scratch each time, which means either spending hours on a document you’ve written variations of before, or submitting something that isn’t quite right.

FlightDeck’s Compliance Manager and COA Prep tools are included in every license tier. Start your free 30-day trial.

Photo QC and Data Delivery: Why Your Upload Process Is Costing You Clients

Flying the mission is half the job. Delivering data that meets client quality standards — every file, every time, with verified completeness — is the other half. And for many commercial UAS operators, the delivery half is where professionalism breaks down.

Blurry images passed to a client. Files missing geotag data. Incomplete uploads discovered only when the client opens the delivery. Upload interruptions on rural connections that result in partial datasets. These problems lose contracts. Here’s how to build a delivery workflow that catches problems before they reach the client.

Why Photo QC Matters More Than Pilots Think

For inspection, mapping, and data collection clients, your photos aren’t just documentation — they’re the deliverable. An image that fails to meet technical specifications doesn’t just look bad; it may be genuinely unusable for the client’s processing pipeline.

Tower inspection clients need images with sufficient depth of field to identify equipment defects. Photogrammetry clients need consistent exposure and overlap for point cloud generation. Agricultural clients need calibrated imagery for accurate NDVI analysis.

Every image that fails quality standards is a rework. Every rework is a return trip or a disputed invoice. Building QC into your workflow before upload — not after the client reviews the delivery — is the difference between a professional operation and an amateur one.

The Core Photo Quality Parameters

For most commercial UAS photography, the critical technical parameters are:

Aperture. Narrower than F/4 risks diffraction softening at common UAS camera sensor sizes. F/4 or wider is the standard for most platforms and is the threshold where image sharpness becomes reliably consistent across varied lighting.

ISO. Above ISO 400, digital noise becomes visible and may interfere with feature detection in photogrammetry and inspection analysis. ISO 100–400 is the clean window for most commercial work.

Shutter speed. Motion blur from a moving drone at the wrong shutter speed is one of the most common QC failures. Your minimum shutter speed should be fast enough to freeze drones motion at typical survey speeds.

EXIF/XMP metadata completeness. GPS coordinates, altitude, gimbal angle, and timestamp embedded in image metadata are critical for photogrammetric processing, KML generation, and data management. Files with incomplete or corrupt metadata may be rejected by client processing pipelines.

How FlightDeck’s QC Uploader Works

FlightDeck’s QC Uploader automates the quality check before any file is allowed into the upload queue. Every image in your upload folder is analyzed automatically against defined quality parameters. Images that fall outside thresholds — below F/4, above ISO 400, or with metadata issues — are flagged before upload begins. You review the flags, address the issues, and only qualified files proceed.

For survey and mapping operations using Propeller Aeropoints, the QC Uploader adds another layer: KML altitude correction using geoid undulation calculations from your ground control point data. The result is KML files where pins render at correct orthometric elevation in Google Earth — not at raw GPS altitude, which in most of North America sits above the actual ground surface.

AWS S3 Integration and Multi-Threaded Upload

For clients who receive data directly to cloud storage — increasingly common in enterprise inspection and data collection — FlightDeck connects directly to your AWS S3 bucket. Configure your credentials once and all qualified uploads go to S3 with multi-threaded processing running up to ten parallel threads.

This matters specifically for field operations on rural LTE or intermittent signal: the multi-threaded engine is built to handle interrupted connections. A SQLite manifest database tracks every file’s upload status — pending, uploading, uploaded, failed. When a connection drops, the upload resumes exactly where it left off. No duplicate uploads. No missed files. No manual retry.

Delivery Verification

After upload completes, FlightDeck runs file-size verification and completion checks to confirm every file arrived intact. A delivery that passes these checks is a delivery you can represent to your client as complete and verified — not just “I think it all went through.”

Your FlightDeck Confirm Progress dashboard shows every delivered site with color-coded status: uploaded, forms submitted, fully complete. At the end of every field day you know exactly where your project stands.

Download the free 30-day trial and build the QC and delivery workflow that keeps clients coming back because your data is always right the first time.

How FlightDeck’s 3-Phase Update Turns Raw Site Data Into a Mission-Ready Project

FlightDeck software showing the 3-phase site update workflow with geocoded site data, weather overlay, and mapping tools

One of the most time-consuming parts of managing a large commercial UAS project isn’t the flying — it’s the daily overhead of keeping your site list current. Geocoding new addresses. Pulling weather for 80 remaining sites. Generating a map your crew can actually use in the field. Doing it all again the next morning because conditions changed overnight.

FlightDeck’s 3-Phase Update collapses that workflow into a single click. Here’s exactly what it does and why it matters for professional UAS operations.

What the 3-Phase Update Is

The 3-Phase Update is the core processing engine of FlightDeck. It runs against your master project data file — the central record containing every site in your current project — and executes three sequential operations automatically.

You click run. FlightDeck does the rest.

Phase 1: Geocode

Every site in your project needs accurate GPS coordinates to function in any downstream workflow: airspace checking, weather retrieval, map generation, KML export. When you import sites from a client spreadsheet, many will have only a street address — or sometimes just a Site ID and a tower type. Geocoding converts those addresses into precise coordinates.

FlightDeck reads every site that lacks confirmed GPS coordinates and sends the address field to the OpenCage Geocoding API. The resulting latitude/longitude is written directly back to your master record. New sites added from a project import are geocoded and ready to fly within seconds of the update completing.

The system is smart about what it processes: existing complete records are skipped. Only new or incomplete entries are touched, so running the update multiple times per day doesn’t duplicate work or overwrite good data.

Phase 2: Weather

For every site scheduled but not yet flown, FlightDeck queries OpenWeatherMap and retrieves current conditions plus a 5-day forecast. Seven data points per site, per day:

  • Temperature
  • Wind speed and gusts
  • Wind direction
  • Cloud cover and sky conditions
  • Visibility
  • Precipitation probability

All of this is written to your master record automatically. Your entire project’s weather picture updates in one pass.

The color-coded forecast display gives you the field-ready view immediately: green dot means clear and favorable, red means rain, blue means snow or ice, gray means overcast. At a glance, across every remaining site, you see which days and which locations are flyable — before you brief your crew, before you load the trucks, before anyone drives anywhere.

Phase 3: Google Maps Report

The final phase generates a shareable Google Maps pin layer showing every site in your project, color-coded by flight status:

  • Scheduled but not flown
  • Flown and awaiting upload
  • Uploaded and complete
  • Flagged or problematic

The output is a formatted file you import as a layer into Google My Maps. Share the link with your crew chief, your project manager, or your client. Anyone with the link can see exactly where every site stands — no calls asking for status updates, no manual spreadsheet reports.

Update the layer daily by replacing it with a fresh export. Your crew is always looking at current status without any manual formatting or data entry.

What This Replaces

Before FlightDeck, running this workflow manually meant: opening a geocoding tool or Google Maps for each new site, pulling up a weather app for each location, manually updating a spreadsheet, generating a map in some external tool, and sending it out. For 20 sites that’s an hour. For 150 sites, it’s most of a morning.

FlightDeck does all of it in the time it takes you to pour a second cup of coffee.

Download the free 30-day trial and run your first 3-Phase Update. Load your site list, click run, and see what an hour of daily admin work looks like when it takes 20 seconds or less.